WPZOOM is well-known for its premium WordPress themes. Lesser-known, is that WPZOOM has released its own drag and drop page builder – the ZOOM Builder. That is exactly what we are going to examine.
For this review, we are going to use the ZOOM Builder with the Genesis Sample theme. The Sample theme is a free theme packed with the recently reviewed Genesis Framework.
The ZOOM Builder installs like any other WordPress plugin. You can either upload it with WordPress, or over (S)FTP. Once installed, you can activate the plugin from the Installed Plugins screen.
Custom Post Types

Upon activation, you will notice that ZOOM Builder has add several entries to the WordPress Admin menu. At the top there are four new panels for the ZOOM Builder’s custom post types: Clients, Slideshow, Team, and Testimonials.
These custom post types allow you to create a text with the editor and upload a Featured Image. Except for the Slideshow, the post types include additional custom fields regarding Client Options, Member Details, and Author Details.
ZOOM Builder Settings
The ZOOM Builder panel is located at the bottom of the WordPress Admin menu.
The Settings comprehend three tabs: General, Widgets, and Frontend. The General section on its turn serves two series of check boxes: Enabled Modules and Builder-Enabled Post Types.
With the Enabled Modules you control which modules are available for the ZOOM Builder. Modules are the building blocks of ZOOM Builder layouts.
The ZOOM Builder installs with the ten modules:
- Call To Action
- Clients
- Contact Form
- Feature Box
- Media Slider
- Posts
- Pricing Table
- Team
- Testimonials
- WYSIWYG
Please note that unchecking the Clients, Media Slider, Team and Testimonials modules, also deactivates the custom post types concerned.
The check boxes in front of the Builder-Enabled Post Types indicate where you can create layouts with the ZOOM Builder.
When you have disabled the Clients, Team, and Testimonials at the Enabled Modules above, then you will only see Posts, Pages and Slideshow here.

At the Widgets tab, you have the opportunity to exclude those widgets that you do not want to use with your custom layouts.
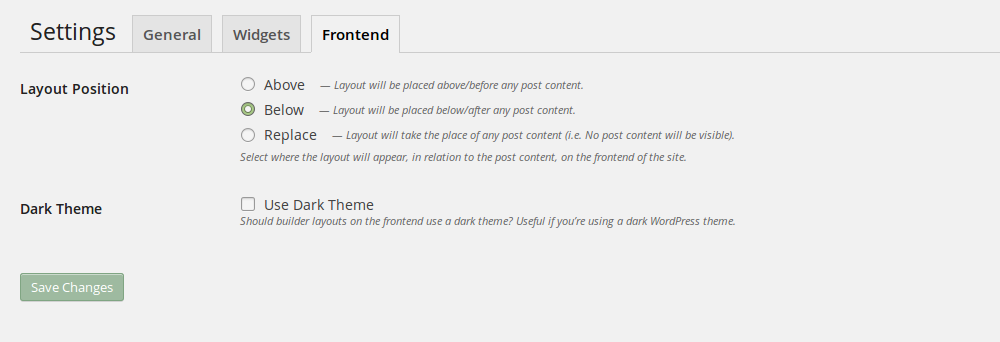
The Frontend tab offers two options. The Layout Position determines where your ZOOM Builder layout will appear with regard to the text created with the WordPress editor. You options here are Above, Below or Replace. In the latter situation any text created with the WordPress editor will be hidden.
At the Frontend tab you can also check whether your theme uses a light text on a dark background.
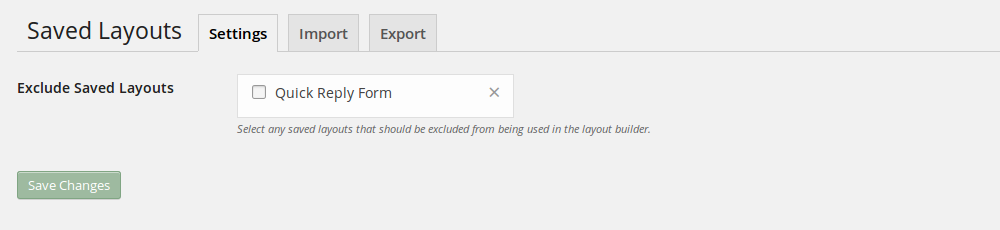
Saved Layouts are layouts that you have created earlier, and saved for re-use. You can use Saved Layouts as templates for other layouts. Like for example the Quick Reply Form above that I created when testing ZOOM Builder. Optionally, you can hide some or all of your Saved Layouts.
A big time saver is that you can export Saved Layouts, transfer these to another WordPress install and import them over there.
The ZOOM Builder plugin will auto-update when you have entered your license key at the License page.
Finally, Reset Widgets. Here you find a button that lets you delete all widgets. Rest assured, this does not affect the widgets that you have applied through the Appearance panel, only the instances used in ZOOM Builder layouts.
Layout Builder
The ZOOM Builder adds a meta box below the WordPress editor. This meta box consists of two sections.

The available widgets are located at the top. The widgets with the blue background, are the (enabled) Builder Modules. The WordPress widgets show up with a light gray background – except those excluded within the ZOOM Builder Settings.
The rectangle box at the bottom, below the widgets, is the canvas where you assemble your Builder layout. A layout consists from one or more rows.
You have the ability to arrange one or more rows in groups. Why is that relevant? Because each groups can have its own settings. The most obvious one is the number of columns.
You can set the number of columns with the middle button at the left from one to five. Here it show “1”.

Each group can also have its own styling. To adjust the styling of a group, click the middle button – the gear button – at the right.
For each group you can set the font color, assign a background color or upload a background image, enter the desired padding and margins, and add borders.
A contrasting font color and background are simple tricks to emphasize a specific group of rows. These Group Settings offer you the means to do just that.
ZOOM Builder Project
Okay! Now that we have completed our tour of the Layout Builder, we know all we need to know to start a project. Let us create a static homepage, just like we did with the Visual Composer.
To begin, we need a full width top row for a welcome message. In order to create this text, we drag the WYSIWYG widget to the canvas.
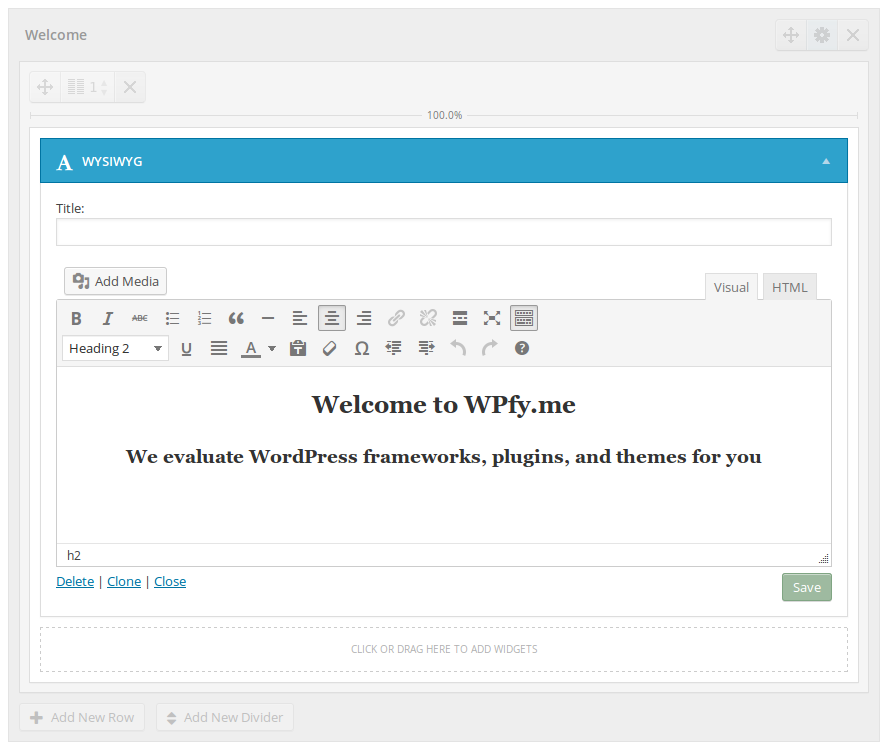
We see the default WordPress editor with WYSIWYG and HTML mode. Depending on your preference you can style text with the editor buttons, or with HTML tags and CSS classes.
The second row will display our latest posts from the framework, plugins, and themes categories. Since this is going to be a three column row, we need to create a new group.
Hit the [Add New Group] button and increase the Amount of Columns to three. Now we have a new row with three columns.
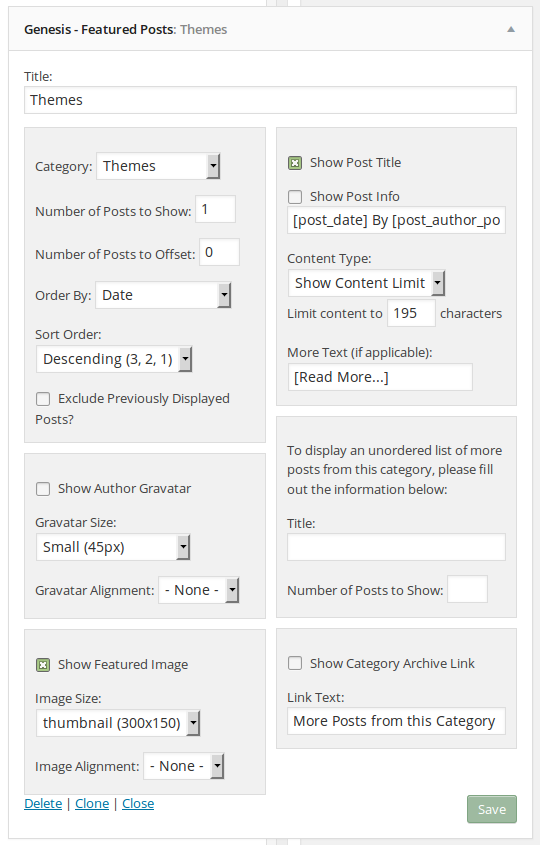
An advantage of the ZOOM Builder is that it supports all WordPress widgets. Because of that, we can add three Genesis Featured Posts widget to this row.
However, the ZOOM Builder’s Posts Module offers comparable features as the Genesis Featured Posts widget, so that you can achieve the same results with any other theme.
We are going to add a third row, this time with two columns. The first column needs to cover about 2/3 of the row, and the second will take the remaining space.
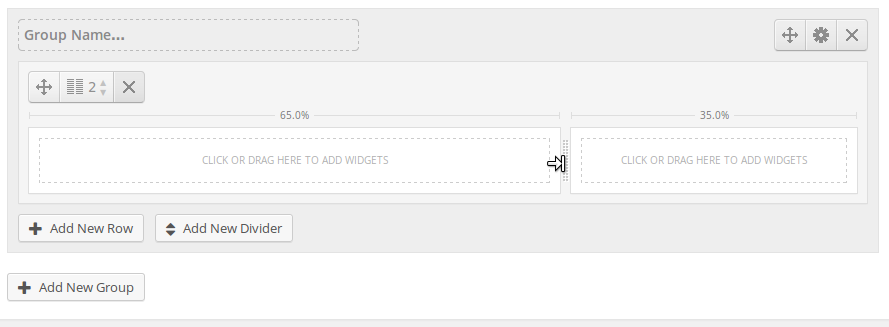
By default, all columns have the same width when you create a row with two or more columns. In case of two columns, both columns are 50% width.
We can solve this by dragging the slider between the two columns to the right, until width of the right column has been reduced to 35%. That is easy.
The first column should display a Google Map to our offices. I have installed the Google Maps Widget, but you can use any other widget for this purpose.

We want to add a quick reply form to the second row. We will use the Contact Form Module of the ZOOM Builder here.
The Contact Form Module opens with Name, E-mail, Subject, and Message fields. I have removed the Subject field for our little project, so that field is missing in the image above.
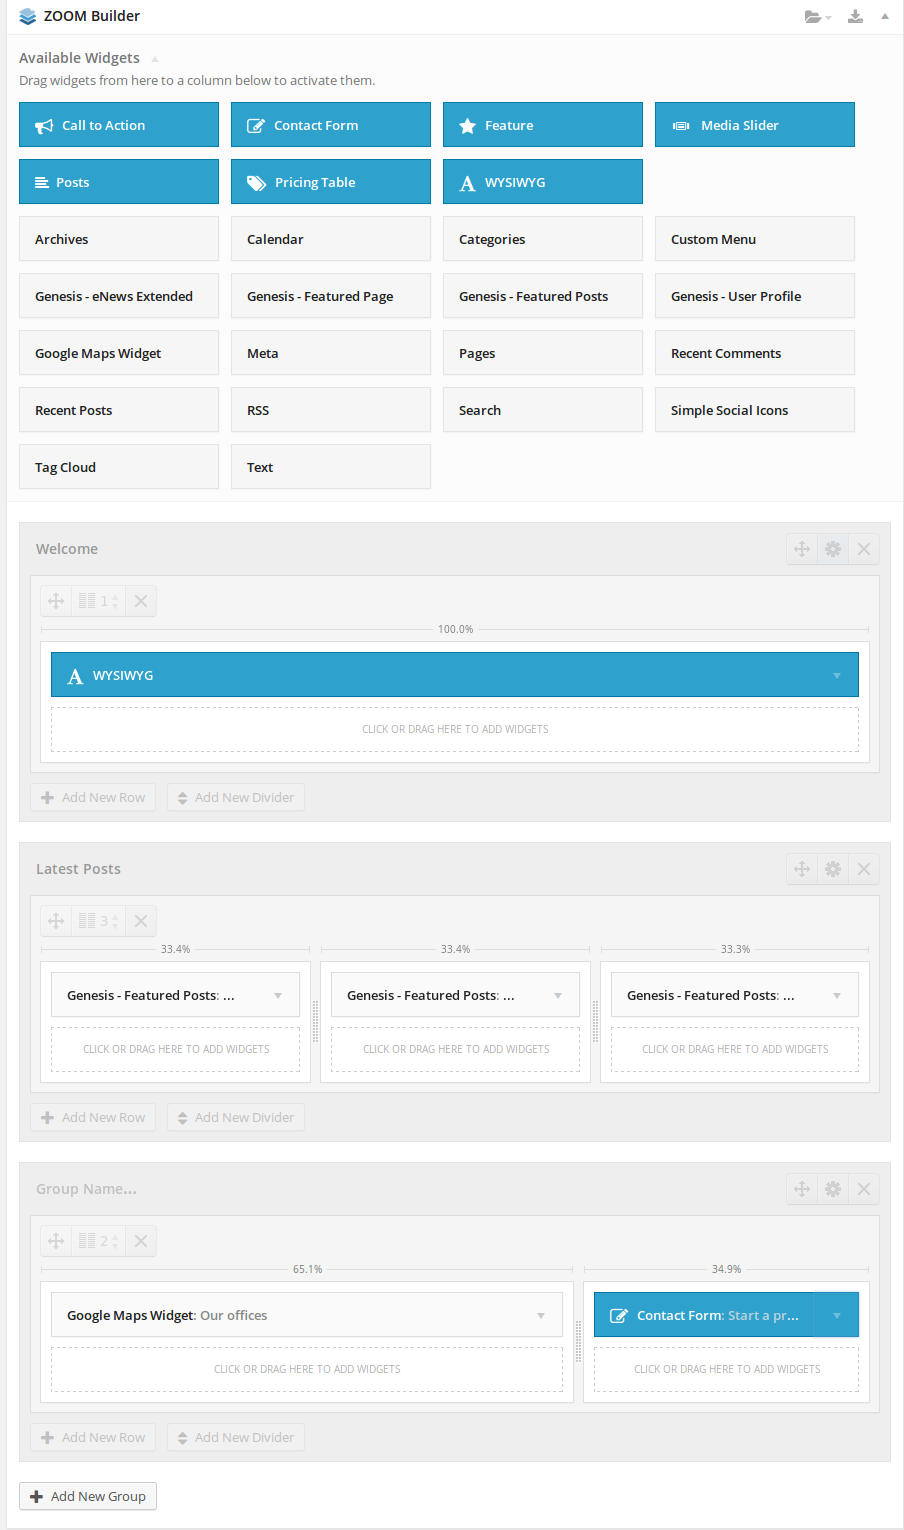
That is it. We have added our three rows. Here the entire ZOOM Builder meta box with homepage as seen on the backend:
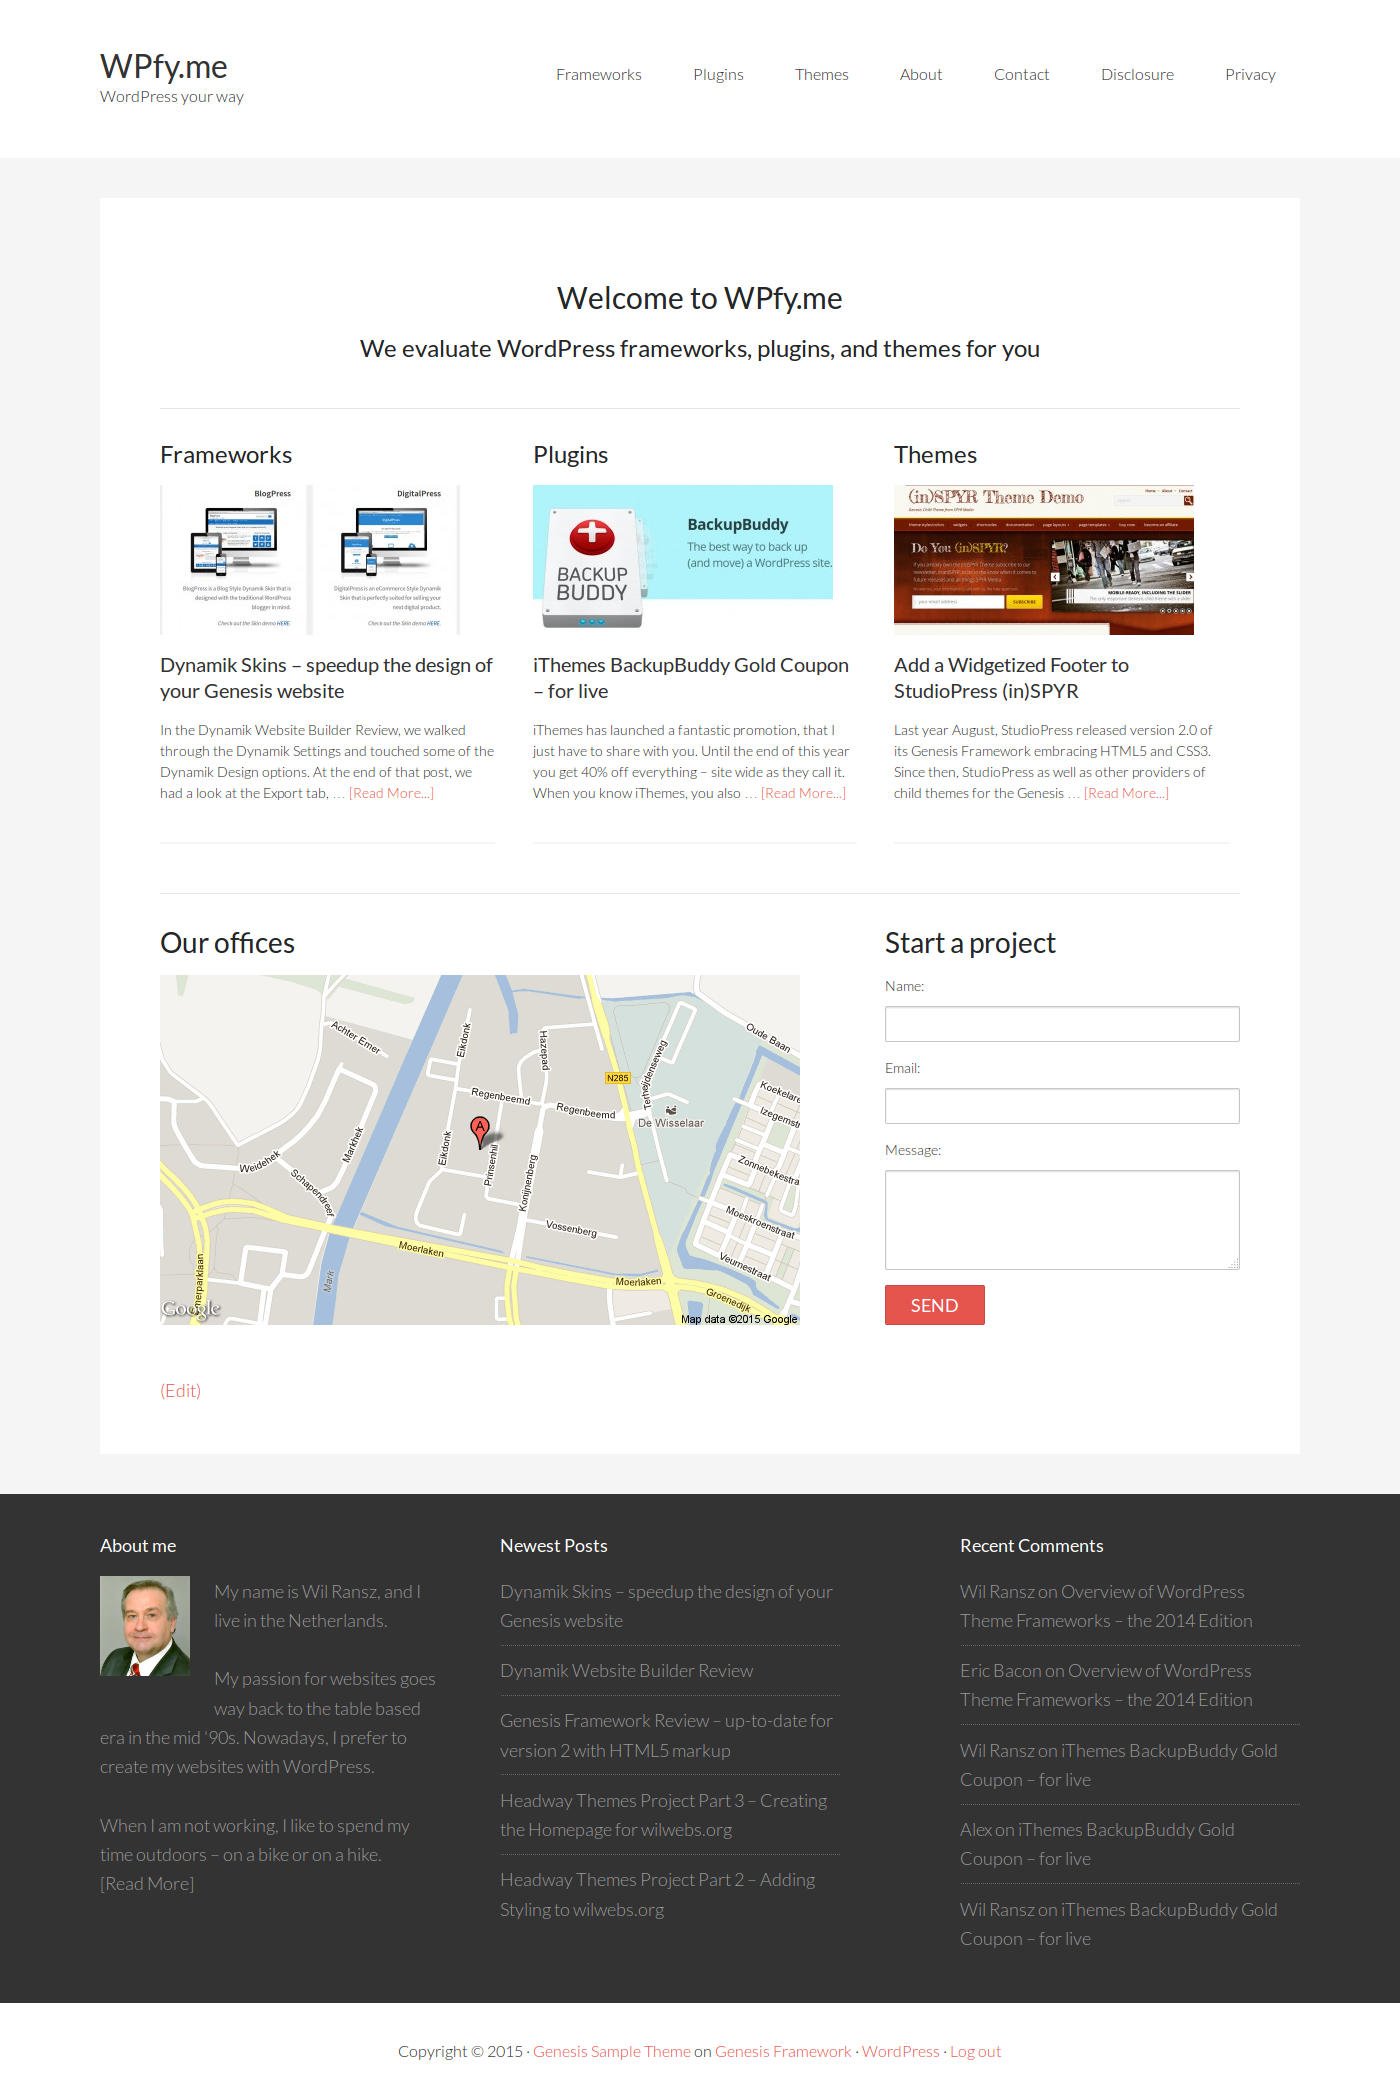
And this is the homepage in its full glory:
 That is not bad for a start. And more importantly, it did not take much time to create this static homepage either.
ZOOM Builder Pre-Built Layouts
Another way of creating layouts is by using templates – pre-built layouts in WPZOOM lingo.
ZOOM Builder ships with 10 pre-built layouts: Agency, Contact Page, three Corporate layouts, two Landing Pages, Magazine, Plugins, Pricing Page, ZOOM Builder Modules, and iPhone App.

These layouts become available by clicking the folder icon in the top right corner of the ZOOM Builder meta box.
The layouts below the Predefined Layouts heading are the pre-built templates that come with the ZOOM Builder. The Quick Reply Form at the top, is a layout that I have created and saved myself – it is a Saved Layout.
Saving a layout, is a matter of clicking the download icon next to the folder icon. Give it a name, done. As we have discussed earlier, you can export Saved Layouts and transfer these to other WordPress installs.
Here are previews of the pre-built layouts:
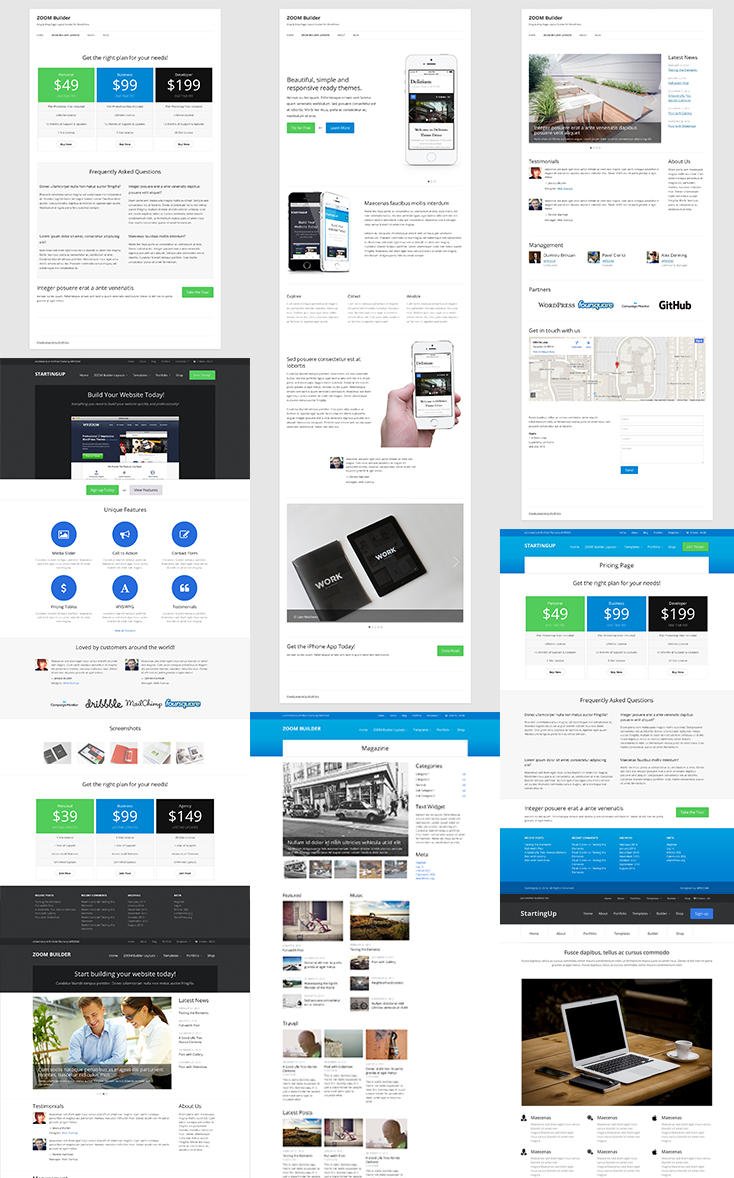
Of course, you do not have to accept these layouts as they are. You can tweak a pre-built layout as you wish – and save it as a new template.
Final Words
You can create a layout from scratch, or give your layout a head start by selecting one of the pre-built templates. Either way, creating professional looking pages and posts does not require any coding. Just drag, drop, point, and click.
And a big plus of the ZOOM Builder is that this plugin not only works with any WordPress theme, but also with any widget.
The ZOOM Builder is available with three plans:
- Personal $59 – 1 Site License
- Business $99 – 5 Site License
- Developer $159 – 20 Sites License
With the Developer plan you also get the Photoshop layered (PSD) files of the pre-built layouts. You can always upgrade to a higher plan.
All three plans include 12 months of support and updates. After 12 months, the ZOOM Builder will continue functioning, but you are no longer entitled to updates and support.
Renewing your license is possible at 50% of the original price.
Leave a Reply