With the release of the Themify Flat theme, Themify also introduced its Themify Builder – a drag-and-drop Page Builder. In this post, we will explore this Themify Builder more in detail.
The Page Builder is available for pages and posts. Not only for regular WordPress posts, but for custom post types too.
You launch the Themify Builder is by clicking the Page Builder tab in the Themify Custom Panel. You find this panel directly beneath the text editor on the Edit Post and Edit Pages screen.
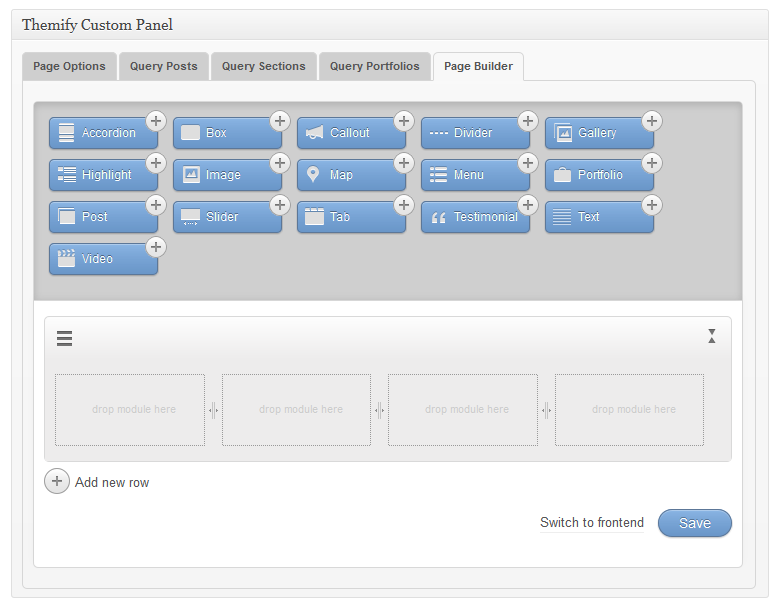
Creating content with the Page Builder is a matter of dragging modules to the canvas. In its initial stage, the canvas shows a row with four columns.

The left side of the row displays the row menu. This menu offers two options; delete and duplicate. At the right there is a toggle that allows us to collapse or expand a row.
You can also have one, two or three columns. Just drag the divider between two columns to the left or to the right. Do you want to add a row? Simply click the gray button with the + sign at the left just below the last row. You can add as many rows as you like.
The modules available are: Accordion, Box, Call-out, Divider, Gallery, Highlight, Image, Map, Menu, Portfolio, Post, Slider, Tab, Testimonial, Text, and Video.
Outlining the Page
For our case, we are going to compose a homepage with three content rows. We will have a slider in the top row. Next, we are going to showcase our main categories in row number two – a row with three columns. And finally, we will add a video and a map in the two column row above the widgetized footer.
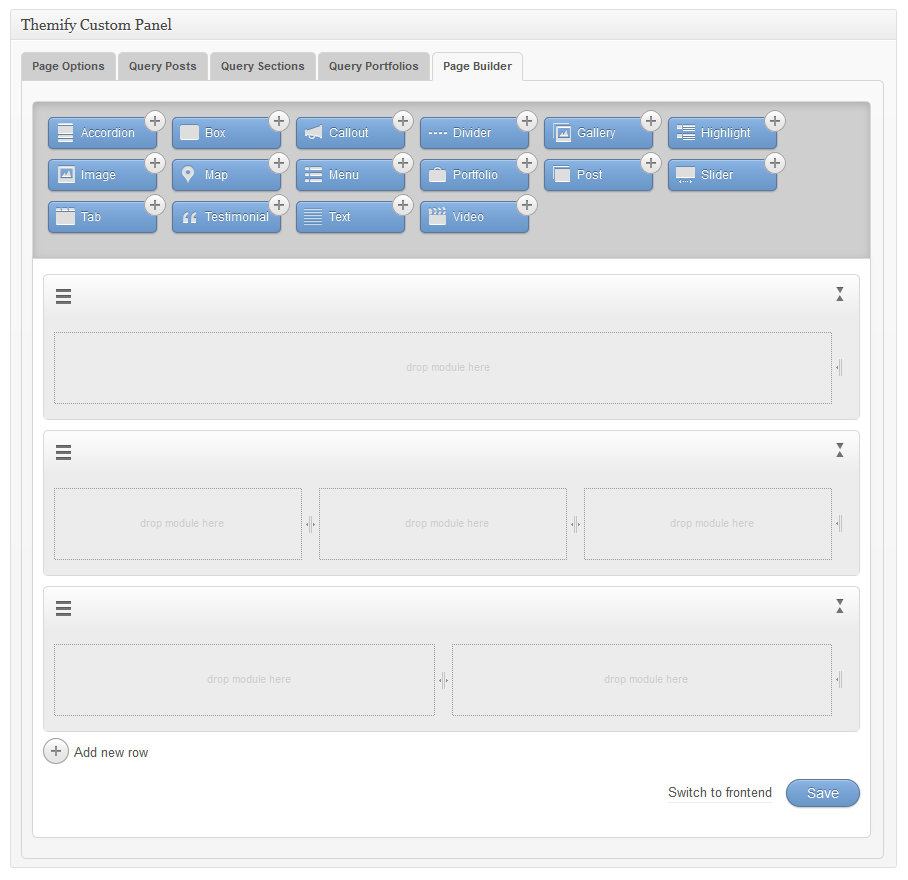
Our first step is replacing the initial four columns by one; select one of the outer dividers and drag it to the other side. Mission accomplished.
In order to add row number two, we click the gray + sign in the left corner below the last row. This delivers another row, again with four columns. Drag the most left dividers to the middle, and move the most right further to the right. Done.
Hit the + sign once more for our third row. Drag the most left divider to the middle, and then a little back to one third. The Page Builder will create the other two columns for us.
Oops! Our plan was a middle row with three columns. No problem! Place the cursor somewhere between the row menu and the toggle, and drag the last row above the second row. Done!
Assembling the Page
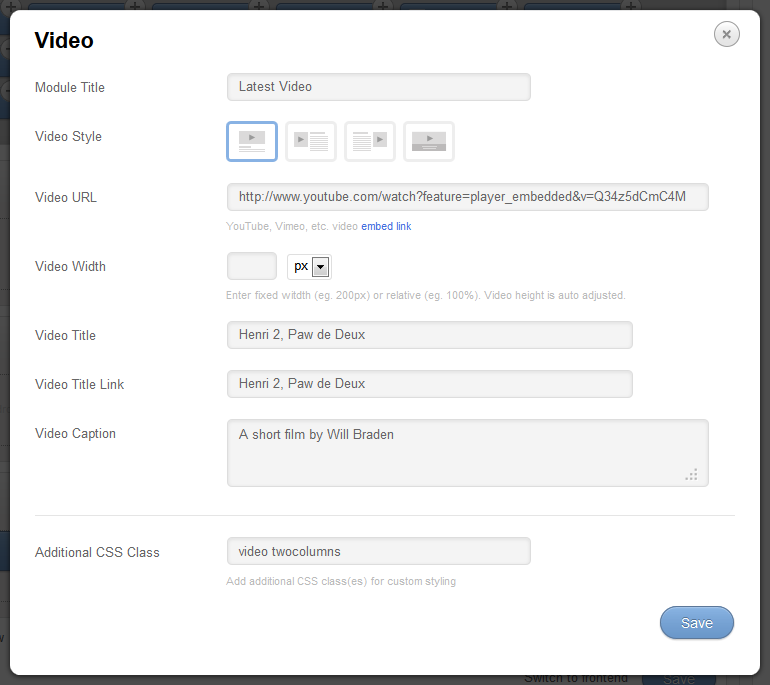
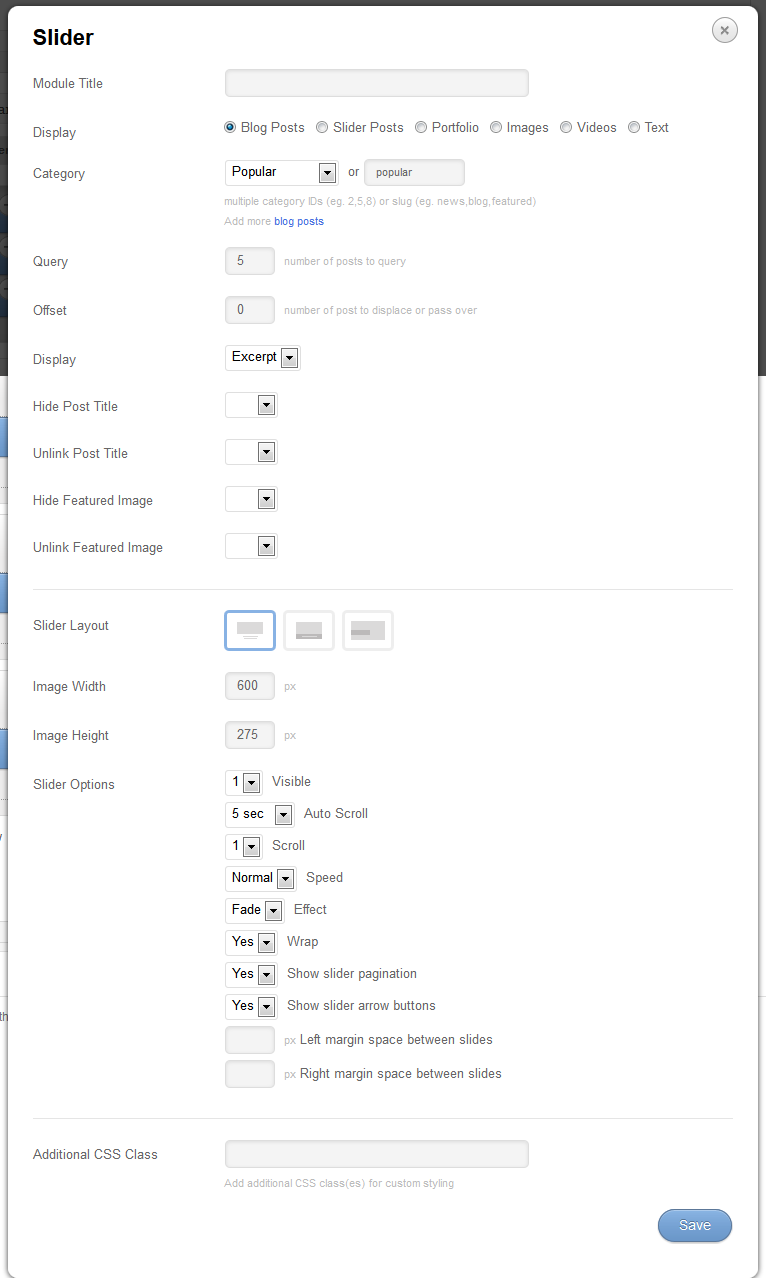
Now we are going to add the modules to their destination. Let us start with a Video in the first column of the last row. Drag the blue Video button to its destination. A wizard opens as soon as the module arrives on its spot. This wizard presents a form with setting. Some required, other optional.
When you are done with the form, hit the [Save]-button twice. First to save the form, the second to save the page we are building. To complete the row, we add a Map next to the Video.
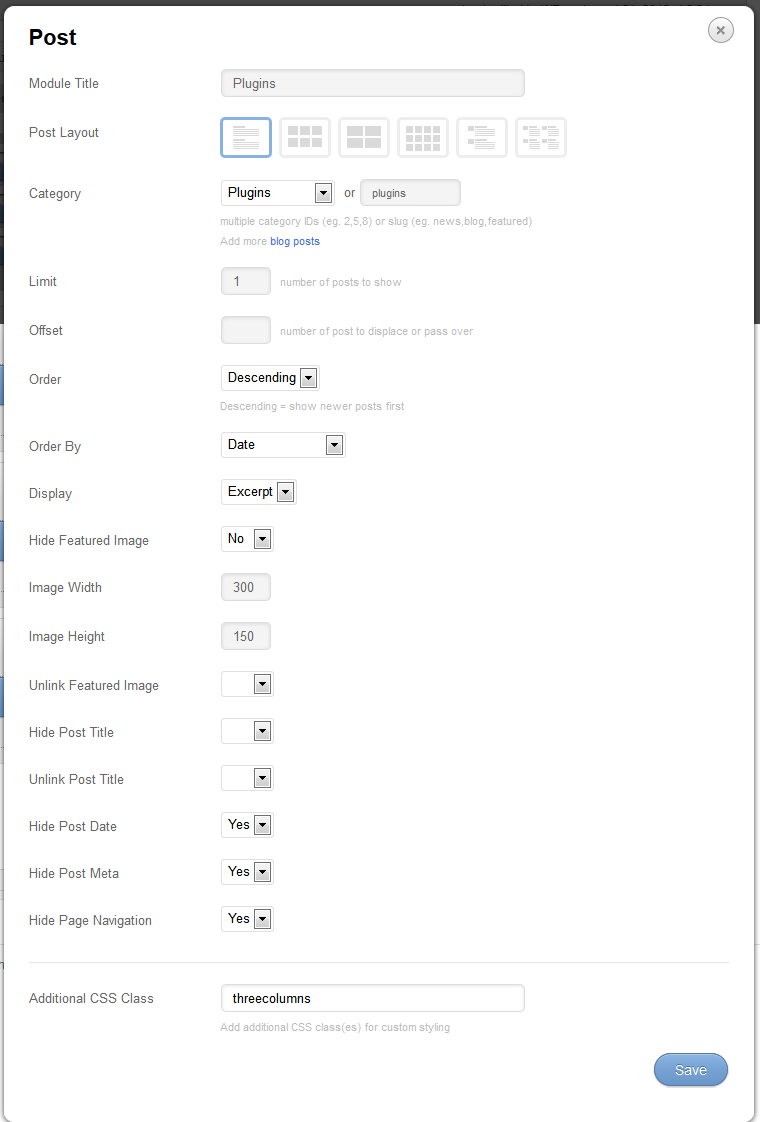
In the middle row, we add three modules of the Post type next to each other. The first from the category ‘Frameworks’, followed by ‘Plugins’, and last but not least ‘Themes’.
In order to finalise our page, we add a Slider to the top row. Okay. We are ready to evaluate our efforts.
This is what we’ve achieved:

Front-end Editing
When you are not quite satisfied, you can either return to the back-end, or edit your page in the front-end. To start editing in what-you-see-is-what-you-get-mode, click on the Themify Builder link in the Admin Bar and select ‘Turn on Builder’.
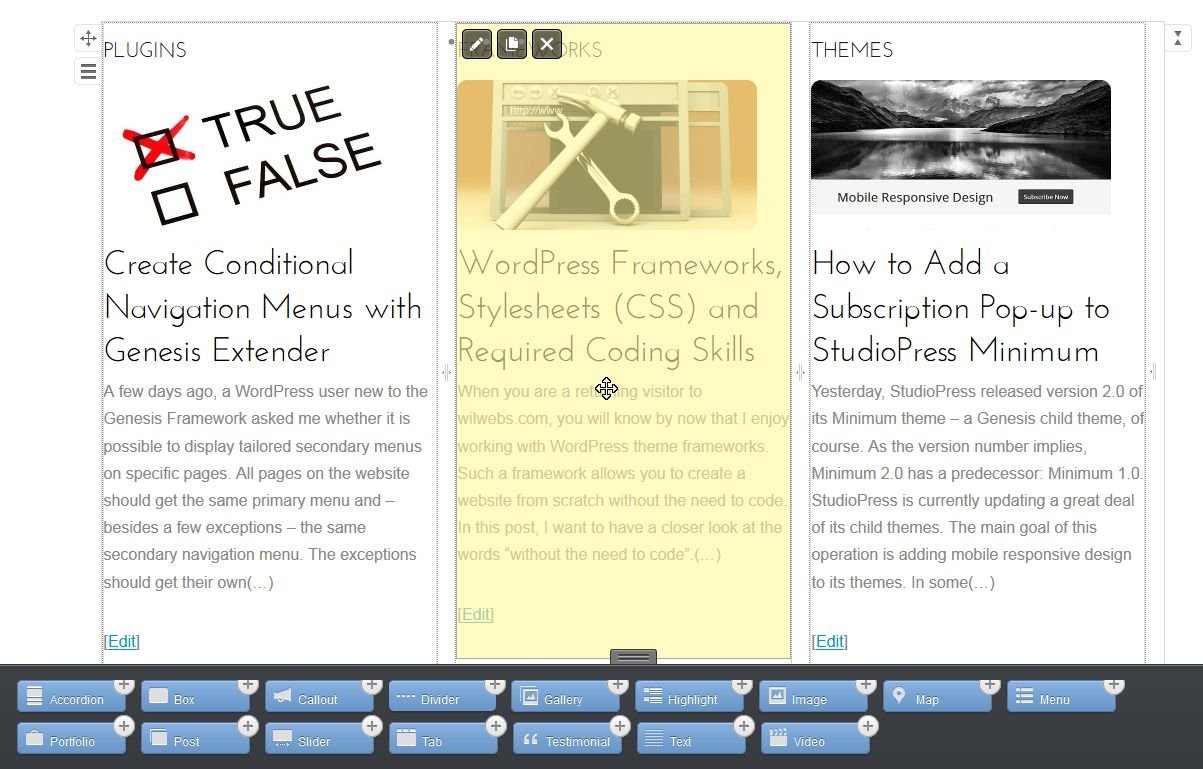
Now you can move and delete rows and modules, add new rows, replace existing content with new modules. Clicking on a specific module adds a yellow overlay and allows you to edit, duplicate or remove the module. And all this can be done in front-end mode.
Simple, fun, effective
Although Themify introduced the Page Builder only recently with the release of Flat, all Themify themes have been updated and include the what-you-see-is-what-you-get Page Builder.
The Themify Builder is responsive, and allows you to apply shortcodes. And as mentioned earlier, you can use the Page Builder with pages and all post types – yes, including custom post types.
The Themify Builder is a great extension to already feature rich themes. This nifty Drag & Drop Page Builder; simple to operate, fun to deploy, and effective, and comes integrated with every theme.
How do you retrieve a deleted page that was deleted while in Themify Builder On?
Hello Greg,
Deleted Pages, Posts and (Partial) Layouts are moved to the Trash of these post types. You can restore them from there when necessary.
Good luck,
Wil Ransz