First week of April, Theming WP replaced the WPReviewLab blog. Apart from the name, the biggest change was dropping about half of the theme reviews. All non-responsive themes have been removed.
The theme deployed on Theming WP is based on the Genesis Sample theme, the free Genesis child theme that comes with the Genesis Framework. The widgets areas on the front page, as well as a couple of single post widget areas, have been added with the Genesis Extender. A plugin covered here on WPfy.me earlier.
 The Theming WP theme is basically the same theme as was used on WPReviewLab, but with a more vibrant color scheme. Although I am happy with the Picton Blue (#4EB9F3) and Flamengo Red (#EF4836), I found the header a bit dull.
To change this, I decided to add a background image with a linear-gradient to the header. Well, that is easy said, but also easy done.
Let me show you how you can move the menus of a Genesis child theme to the header, so that the menus get the same background image as the header.
We are going to upload an image, reposition the menus, and reorder the hooks in the site-header.
Add the background image
Since I work with the Extender on Theming WP, I uploaded the background image with the Genesis Extender.
Next I added the CSS regarding the site-header to the Custom CSS area of the Genesis Extender.
Here are that CSS rule:
.site-header {
    background: linear-gradient(
    rgba(78, 185, 243, 0.6),
    rgba(78, 185, 243, 0.7)),
    url(//www.themingwp.com/wp-content/uploads/genesis-extender/plugin/images/compass.jpg) center center no-repeat;
    -webkit-background-size: cover;
    -moz-background-size: cover;
    -o-background-size: cover;
    background-size: cover;
    height: 160px;
}
The hex value #4EB9F3 of the Picton Blue has been replaced with the corresponding rgba(78, 185, 243, 1) value.
Creating a gradient is a matter of increasing the transparency, by reducing the last digit (1).
Here, the linear-gradient starts at rgba(78, 185, 243, 0.6) and runs until rgba(78, 185, 243, 0.7).
With the Dynamik Website Builder you should follow the same procedure as with the Genesis Extender. Without the Extender and Dynamik, you put the background image to the images folder of the child theme, and add the CSS to the style.css file of the child theme.
 The image above shows that we are heading in the right direction, but we are not quite there yet.
As you can see, the navigation menus still have a solid blue background.
However, I want the menus to have the same background image as the header, without repeating the background image.
Setting the background of the navigation menus to transparent does not bring the desired result.
Reposition the navigation menus
To achieve our objective, we have to reposition the menus into the header.
At this moment, the primary navigation menu still resides on its default location – just below the header.
The secondary navigation menu has already been repositioned from after the header to before the header with this code block:
// Reposition the secondary navigation menu
remove_action( 'genesis_after_header', 'genesis_do_subnav' );
add_action( 'genesis_before_header', 'genesis_do_subnav');
To move both navigation menus to the genesis_header, we need to apply this code:
// Reposition the primary navigation menu
remove_action( 'genesis_after_header', 'genesis_do_nav' );
add_action( 'genesis_header', 'genesis_do_nav');

// Reposition the secondary navigation menu
remove_action( 'genesis_after_header', 'genesis_do_subnav' );
add_action( 'genesis_header', 'genesis_do_subnav');
The last code block regarding the secondary navigation menu (the one with the genesis_header hook), replaces the entire block above (the one with the genesis_before_header hook).
This is where we are now:
 Once again we made some progress, but we need to reorder the header elements.
Prioritizing the hooks
The current order of the header elements is site-title, primary menu, secondary menu.
The order we strive for is secondary menu, site-title, primary menu.
We can resolve this by prioritizing the hooks. Sounds difficult? It simply means that we have to add a number to the add_action lines:
// Reposition the primary navigation menu
remove_action( 'genesis_after_header', 'genesis_do_nav' );
add_action( 'genesis_header', 'genesis_do_nav', 10);
// Reposition the secondary navigation menu
remove_action( 'genesis_after_header', 'genesis_do_subnav' );
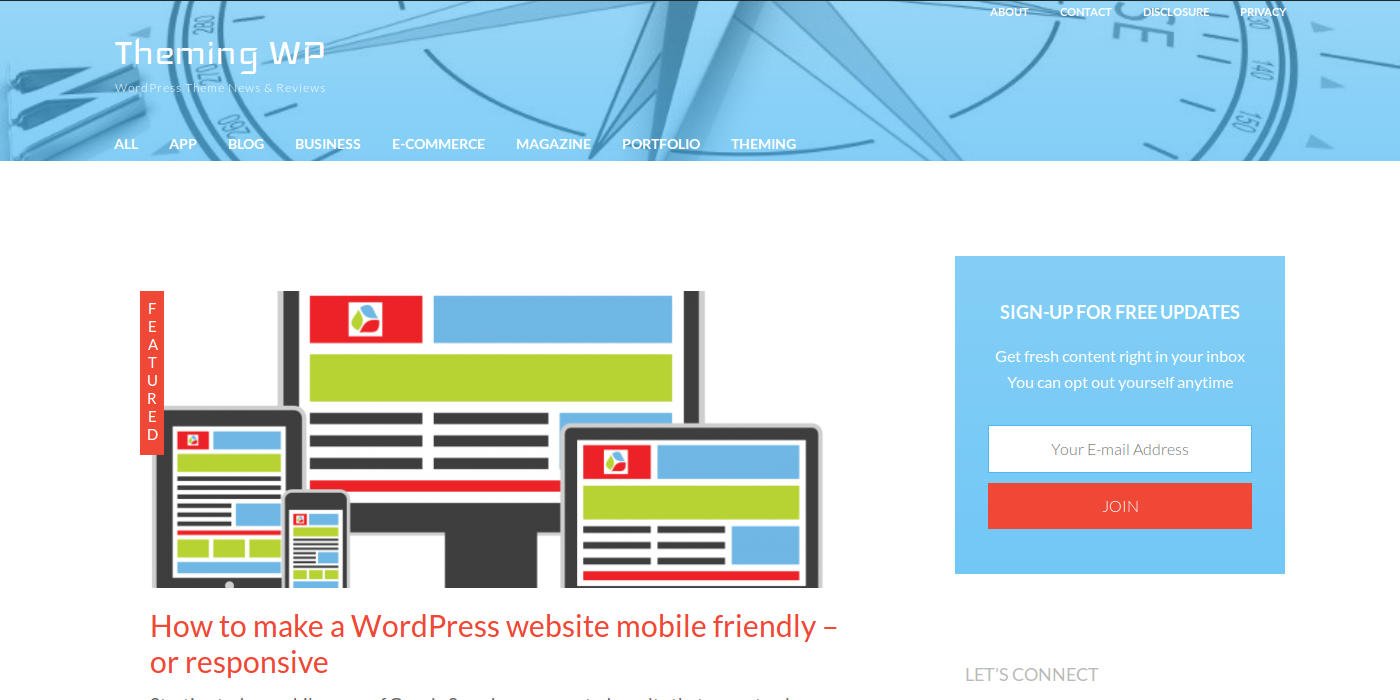
add_action( 'genesis_header', 'genesis_do_subnav', 5);And after adjusting the margins a bit, we have managed to style the site-header as imagined:
 You can see a live example over at Theming WP.
Wrapping up
As you can see, it is quite easy to add a background image to the site-header of a Genesis child theme in a way that the navigation menus are included.
It is a straight-forward, three step process:
- upload the image and add the CSS
- reposition the navigation menus
- prioritize the hooks
How do you customize the Genesis Framework? Do you rather work with the PHP templates and the style.css of the child theme, or do you prefer to use the Dynamik Website Builder or the Genesis Extender?
Leave a Reply