In the Dynamik Website Builder Review, we walked through the Dynamik Settings and touched some of the Dynamik Design options.
At the end of that post, we had a look at the Export tab, where we exported our work as a Dynamik Skin, and as a Genesis child theme.
Besides exporting your work as a skin, you can also import skins.
In this post we will have a closer look at Dynamik Skins. What is a Dynamik Skin, what what can you do with it, why use a skin, and what skin options do you have?
What is a Dynamik Skin?
A Dynamik Skin is a set of pre-customized Design Options. Think of design options like a color scheme, paired fonts, and a ready-made home page layout.
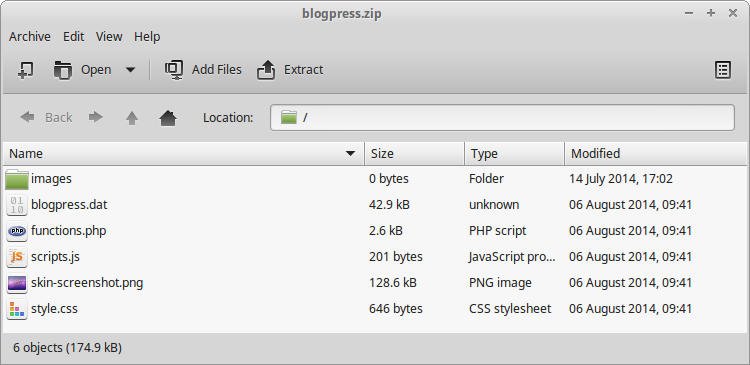
Dynamik Skins download as an zip file. This archive contains a folder with necessary images, a functions.php to register widget areas, a style.css addressing the website elements, a JavaScript file adding interactivity, and a .dat file. The latter tells Dynamik what to do with the contents of the zip.
What can you do with a Dynamik Skin?
The best way to demonstrate this is by an example. So, I transferred WPfy.me to my localhost, and activated the Dynamik Default Skin.
This is how it looks, a clean blog theme with a minimal design:

For some time already, I am thinking about changing the homepage layout of WPfy.me. Instead of the traditional blogfeed on the frontpage, I would rather have a homepage with the styling of a magazine theme.
Until date, I did not find the time to create such magazine theme. Fortunately, there is Dynamik to rescue.
One of the skins available to customers of the Dynamik Website Builder is BlogPress. BlogPress provides the magazine styled homepage I am looking for.
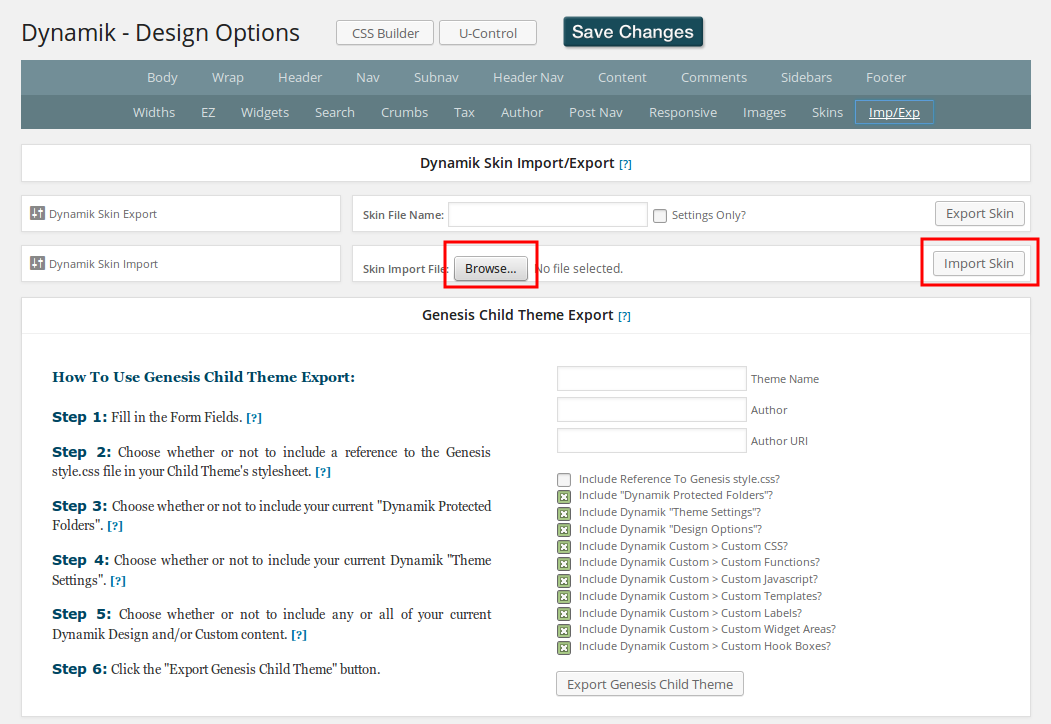
When the BlogPress skin has landed on your computer, you go to the Import/Export tab of Dynamik Design page.
There you hit the [Browse] button to locate the BlogPress archive file.
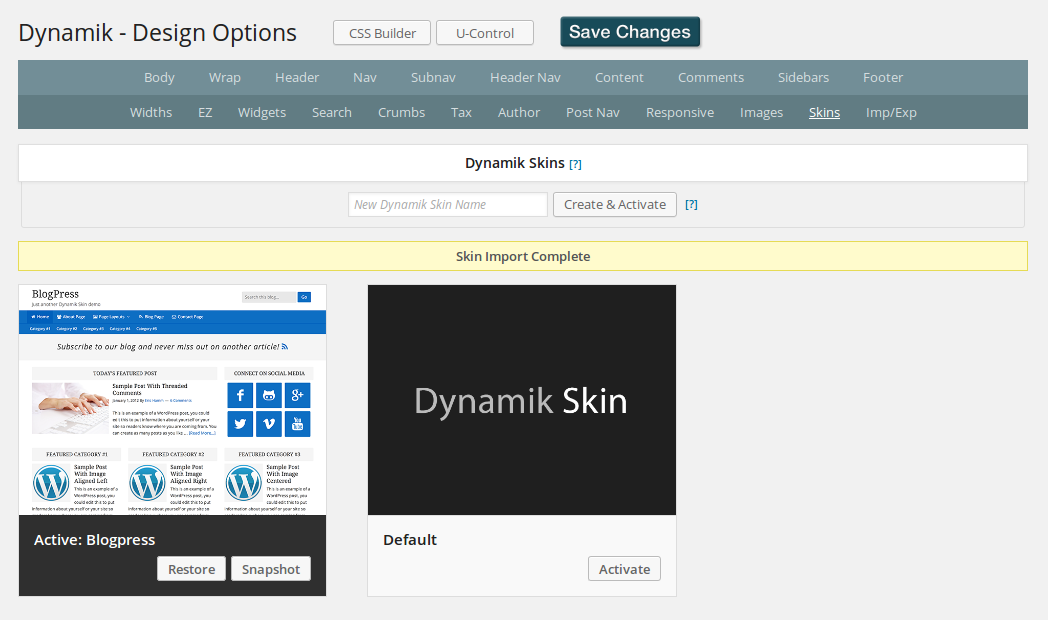
Upon completion of the import, the screen switches to the Skins tab.
There we activate the BlogPress skin. This is comparable to activating a theme.
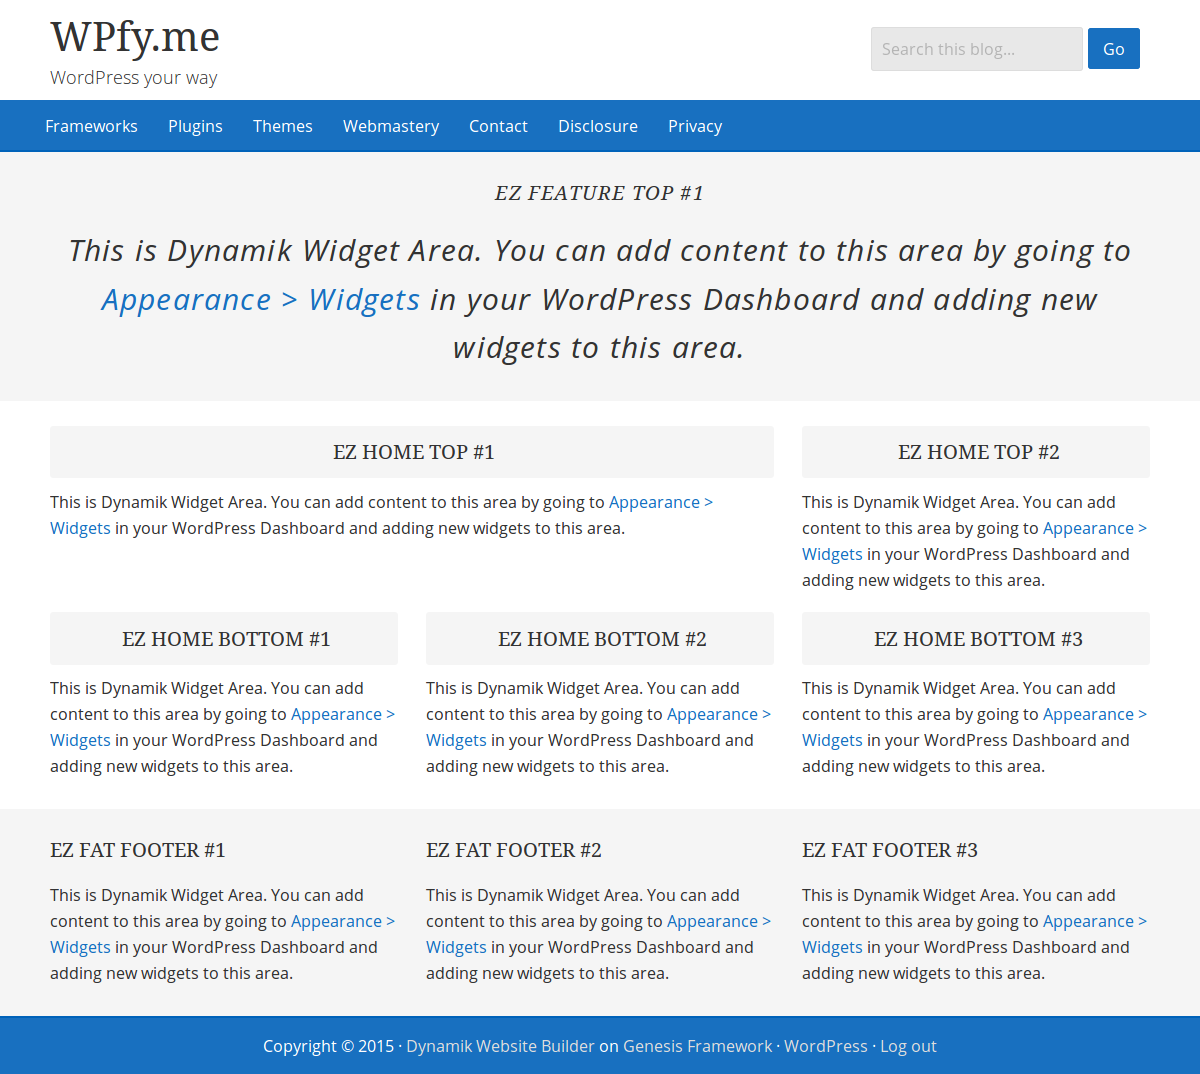
In the image above you see the widgetized homepage of the BlogPress skin. Or rather, we see the BlogPress widget areas. The widgets are still missing.

Here above you see the widget areas of the Dynamik BlogPress skin.
All we have to do, is add the desired widgets:
- EZ Features Top – text widget
- EZ Home Top #1 – Featured Posts widget
- EZ Home Top #2 – Simple Social Icons & text widget
- EZ Home Bottom 1 to 3 – Featured Posts widgets
- EZ Fat Footer – the existing text widget, Recent Posts, and Better WordPress Comments widgets
And this is the result:

Except for one element, the above homepage is the default homepage as it comes with the BlogPress skin.
The only addition, is this CSS rule to center the text widget with the ad in the EZ Home Top #2 widget area:
.sidebar-banner {
	display: block;
	margin: 0 auto;
	text-align: center;
	width: 250px;
}
Everything else is delivered by BlogPress.
One of the things that I definitely want to do, is replacing the default blue by WPfy.me green. But we do not need to start from scratch.
Why use a Dynamik Skin?
Designing a WordPress website usually requires two kinds of skills.
Knowledge of HTML and PHP to create the structure of the website (the coat stand), and CSS to dress-up the website (the coat).
Creating the website structure is for most website owners the hardest part. Especially for first time website owners.
Tinkering with CSS however, creating the styling of the website, is usually experienced as satisfying and fun.
And that is exactly why Dynamik Skins are such a great solution.
All we had to do to get our magazine styled homepage is import the BlogPress skin. It only takes are a few clicks with the mouse.
And once the skin is loaded, you continue adjusting the styling as you want it. Just point-and-click to finalize your custom design. No need to code.
What skin options do you have?
The Dynamik Website Builder comes packed with the Default Skin.
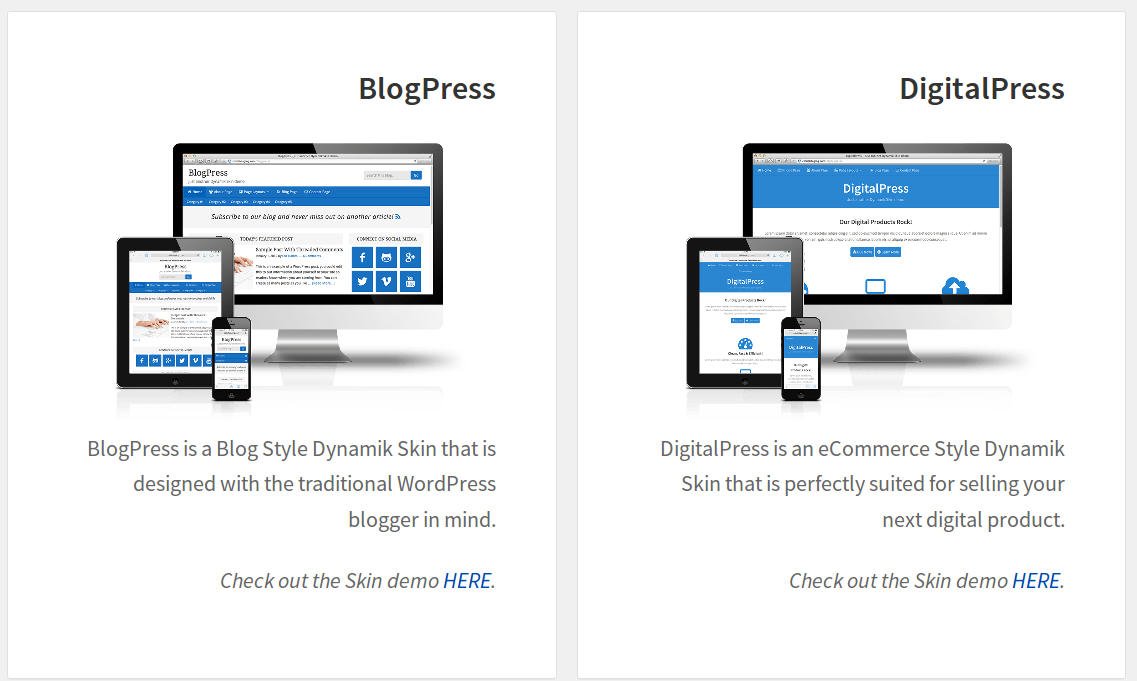
Another eight skins are available from your Dashboard with Cobalt Apps:
- BlogPress – magazine
- DigitalPress – ecommerce
- EnterPrisePress – business
- ProductPress – ecommerce
- SmallBizPress – business
- SocialPress – blogging
- ThoughtPress – blogging
- WritePress – longform content
As a Dynamik customer, you can download these skins for free.
The Dynamik Website Builder is available with three plans:
- Single Site – $89
- Up To 3 Sites – $149
- Unlimited Sites – $239
These prices include one year of support and updates. After the first year, you can renew your license for 50% of the original purchase price.
And because you can always request Cobalt Apps to upgrade your license, you can start with the Single Site license.
Please note that you need the Genesis Framework to activate the Dynamik Website Builder.
As always, do not hesitate when you have any questions or remarks. When you leave a comment, it will be my pleasure to get back to you.
Leave a Reply